I didn't think I was going to get this project done in time to post it today! As it is, I need to type fast:)
I went to Backyard Birds the other day to get some birdseed for my poor, neglected feathered friends. While I was there I thought I'd look at bird feeders. They are expensive! I wanted a finch feeder. They did have a mesh one for only $5, but it was a little hideous. No stylish bird would want to eat from it. So I thought, "I can do this better!" Here is my effort:)
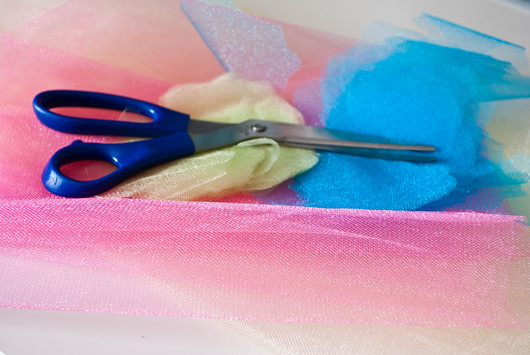
You need some colorful netting. 1/4 yard of the main color, and 1/8 yard of 3 other colors.
Cut a very simple flower shape from a piece of cardboard or cardstock. Take one of the 1/8 yard pieces of fabric and fold it over and over, then using the flower as a general guide, cut through multiple layers to make your flower forms.
Click through for the rest of the post......
Do this until you've used up all 3 of the 1/8 yard pieces.
Take the 1/4 yard piece and fold it in half so the fabric is doubled.

Cut a piece of ribbon the shorter width of the fabric, and pin it in place about 4 inches from the bottom edge.
Sew it in place, through both layers of fabric.
Fold the fabric in half again, right sides together, and sew along the long side edge, and the bottom edge.
Now, this part is harder to explain. Take that bottom edge and pull on each side of it to form a triangle point.
Now sew across this point. Do this to both corners.
Turn your piece right side out. Now it has a flatter bottom, and when you fill it with seed, it will stand.
Now, take another piece of ribbon, or in my case I used a crochet cord, because if it didn't have something crocheted in it, I wouldn't feel like this was my project;) After doing this, I decided it was a bad idea. Use ribbon. The ribbon should be approximately the length of the circumference of your bag. Pin the ribbon to only one side of the bag.
Now I seem to be missing a photo, but that's ok. Sew the ribbon to the bag, but remember, you are only going through two layers of fabric, not the entire bag. My sewing machine did NOT like sewing over this crochet cord, so I turned the bag inside out and sewed from the back. Still - use ribbon.
This is going to be the hanger. I crocheted another cord with a loop at each end. You most certainly can do this, or take a strong cord or ribbon and put loops in each end.
What's that hat doing there you ask? Well, let me tell you. I remembered that the mesh feeder at the store said to hang it someplace where it would be protected from the rain, and that the seed would spoil if it was left wet. So I went over to the dollar store, thinking that I could get a colorful plastic plate to hang the mesh bag from, giving the seed some protection from rain, plus shade for the birds. They didn't have any plastic plates. But then I spied these super cute little girls' hats and thought, "why yes!"
Push one loop of your hanging cord through the top of the hat, and sew it in place by hand. Use a lot of stitches; you want this to be sturdy.
Now let's go back to the flowers. Take several pieces and stack them up.
Using a basting stitch, sew a circle in the middle.
Then pull the thread taut, and take the needle back and forth several times to secure it.
On the other side, spread the petals out, and sew a button. Make as many of these as you wish. I used 6 on my feeder.
Sew them to the bag, in a row, just under the ribbon. Fill it with thistle seed and hang it outside! Ta da! Is that cute or what? Now, I do have some concern that the hat flopping around will frighten off the birds, but no more than branches on a tree, right? The best part? Aside from how cute it is, of course. Because I used ribbon, thread, and buttons that I already had, the materials for two feeders, minus the seed, were just under $4! That's the kind of project I like! I hope you like it too:)


wicked clever, bobbi! the birds in your neighborhood are lucky.
ReplyDeleteNow I expect to see photos of all the happy birds gathering around your spiffy new feeder.....
ReplyDeleteThat is quite the project!
Very cool and springy looking!
All your neighbors will probably want you to make them one, too....